Deploy Your Agent#
The HubFeed agent is a lightweight service that runs on your own infrastructure and connects to private data sources — like Telegram channels, LinkedIn, and X/Twitter — on your behalf. Your credentials never leave your machine.
The agent is open source under the AGPL-3.0 license. Source code is available on GitHub.
Prerequisites#
- Docker and Docker Compose installed (Docker Desktop for Windows/macOS, or Docker Engine for Linux)
- A HubFeed account with an agent token
Step 1 — Generate an Agent Token#
The Agent Token identifies your agent to HubFeed. It is the proof that you own the agent you claim to have.
- Log in to HubFeed and go to your Profile page
- Scroll to the Agent Tokens card
- Click Generate and give your token a name
- Copy the token — it will only be shown once
Important: Store your token securely. If you lose it, revoke the old token and generate a new one.
Step 2 — Get the Agent#
Option A: Pull from the Container Registry (Recommended)#
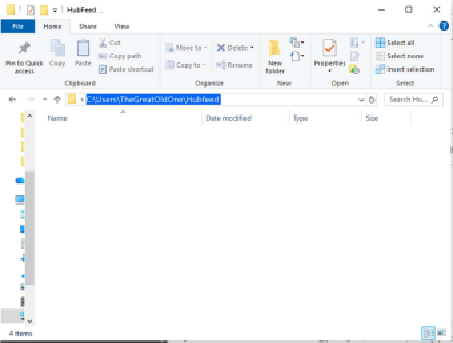
Create a local folder on your computer. You can name it as you please — we recommend naming it HubFeed to ease its retrieval (e.g. C:\Users\YourName\HubFeed on Windows, ~/HubFeed on macOS/Linux). We will refer to it as the "HubFeed folder" in the next steps.
Navigate to the HubFeed folder in File Explorer (Windows) or Finder (macOS). Click on the address bar at the top where the folder path is displayed and copy the path.
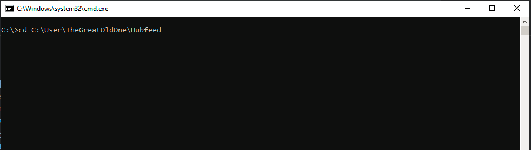
Open a terminal: on Windows, press Win+R, type cmd, and press Enter. On macOS/Linux, open the Terminal app.
In the terminal, type cd, press space, then paste the path you copied (Ctrl+V on Windows, Cmd+V on macOS) and press Enter. This will navigate the terminal to your HubFeed folder.
Now copy and paste the following command and press Enter:
docker pull ghcr.io/hubfeed-io/local-agent:latestThis will download the latest version of the agent.

To pin a specific version:
docker pull ghcr.io/hubfeed-io/local-agent:1.0.0Option B: Build from Source#
Clone the repository and build locally:
git clone https://github.com/HubFeed-io/local-agent.git
cd local-agent
The included docker-compose.yml will build the image automatically when you start the agent (see Step 3).
Step 3 — Configure and Start the Agent#
3.1 — Configure credentials#
Create a .env file in your HubFeed folder to set your agent UI credentials.
Linux/macOS quick setup
cat > .env << EOF
AGENT_UI_USERNAME=yourusername
AGENT_UI_PASSWORD=yoursecurepassword
EOF
On Windows:
- In File Explorer, click View > Show > File name extensions to ensure extensions are visible
- Right-click in your HubFeed folder > New > Text Document. Make sure it is a plain
.txtfile, not a Word or LibreOffice document - Open it and paste:
AGENT_UI_USERNAME=yourusername
AGENT_UI_PASSWORD=yoursecurepassword- Save and close, then rename the file to
.env(remove the.txtextension)
Warning: Change the default credentials before deploying to production. The defaults are
admin/changeme.
3.2 — Create the Docker Compose file#
If you pulled from the registry (Option A), create a docker-compose.yml. If you built from source (Option B), the docker-compose.yml is already included — skip to step 3.3.
Linux/macOS quick setup
Create the file with any text editor and paste the YAML content below.
On Windows:
- Create another text file in your HubFeed folder. Make sure it is a plain
.txtfile, not a Word or LibreOffice document - Paste the following content:
version: '3.8'

services:
  hubfeed-agent:
    image: ghcr.io/hubfeed-io/local-agent:latest
    container_name: hubfeed-agent
    ports:
      - "8989:8080"
    volumes:
      - ./data:/app/data
      - ./logs:/app/logs
    environment:
      - AGENT_UI_USERNAME=${AGENT_UI_USERNAME:-admin}
      - AGENT_UI_PASSWORD=${AGENT_UI_PASSWORD:-changeme}
    restart: unless-stopped
    networks:
      - agent-network

networks:
  agent-network:
driver: bridge- Save and close, then rename the file to
docker-compose.yml(remove the.txtextension)
3.3 — Start the agent#
Go back to the terminal (or command prompt) you opened in Step 2 and run:
docker compose up -dThe agent should now be running. You can verify by opening Docker Desktop — the container should show a solid square icon (running). If it shows a play triangle, the container is stopped.
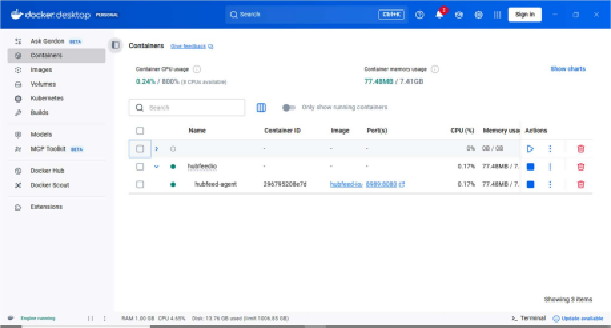
You can also click the port link (e.g. 8989:8080) in Docker Desktop to open the agent UI directly.
Useful commands
View logs:
docker logs -f hubfeed-agentStop the agent:
docker compose downStep 4 — Connect to the HubFeed Agent#
Open the agent UI at http://localhost:8989 (or click the port link in Docker Desktop).
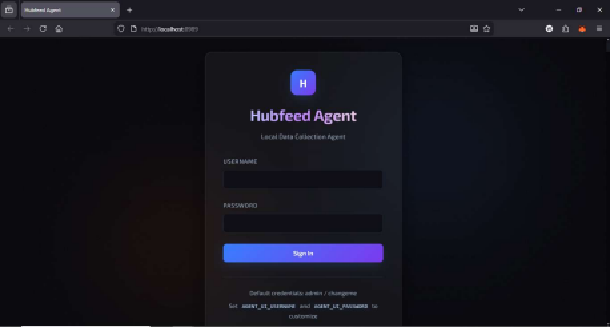
Log in with the credentials you configured (admin / changeme by default). Paste the agent token you generated in Step 1 into the Agent Token field and click Save — the agent verifies the token and syncs with HubFeed.
The agent connects to https://hubfeed.io by default. To point it at a different instance, set the HUBFEED_API_URL environment variable (see below).
Once connected, the agent will appear in your HubFeed dashboard and begin executing workflow tasks.
Step 5 — Add an Avatar#
Avatars are your platform accounts registered with the agent. In the agent UI, go to the Avatars panel and click Add Avatar, then choose the platform you want to set up.
Telegram#
- Select Telegram and authenticate by scanning the QR code with your Telegram app, or by entering the phone number associated with your account
- Once added, click Configure on the avatar
- All channels and groups your avatar has access to are now displayed
- Search for the channels you want to monitor — the search matches the display name, not the channel ID
- Toggle the button on the right to whitelist a channel (all are blacklisted by default)
- Set the collection frequency for each whitelisted channel
If you've just joined new channels and don't see them, click the refresh button in the top right corner.
LinkedIn#
- Select LinkedIn and authenticate through the browser login flow that opens — authentication can take up to 2 minutes
- Once authenticated, your avatar is ready — LinkedIn currently supports Timeline monitoring
X (Twitter)#
- Select X (Twitter) and authenticate through the browser login flow that opens — authentication can take up to 2 minutes
- Once authenticated, your avatar is ready — X supports Home Timeline, User Tweets, and Hashtag monitoring modes
Warning: Setting too high a collection frequency may flag your avatar as a bot and result in being removed from channels and groups. Choose conservative intervals.
Your avatar is now set. You'll find it in HubFeed when using the Avatar Selector block on your workflow canvas.
Important: Data collection can only happen while the agent is running. Stopping the agent or turning off your computer will stop monitoring. For 24/7 surveillance, deploy the agent on a dedicated device or server.
Docker Run Alternative#
If you prefer not to use Docker Compose, you can run the agent directly:
docker run -d \
  --name hubfeed-agent \
  -p 8989:8080 \
  -v $(pwd)/data:/app/data \
  -v $(pwd)/logs:/app/logs \
  -e AGENT_UI_USERNAME=admin \
  -e AGENT_UI_PASSWORD=changeme \
  --restart unless-stopped \
  ghcr.io/hubfeed-io/local-agent:latest
Environment Variables#
| Variable | Default | Description |
|---|---|---|
AGENT_UI_USERNAME | admin | Username for the agent web UI |
AGENT_UI_PASSWORD | changeme | Password for the agent web UI |
HUBFEED_API_URL | https://hubfeed.io | HubFeed API URL (override for self-hosted instances) |
Persistent Data#
The agent stores its data across two mounted volumes:
| Path | Purpose |
|---|---|
data/config.json | HubFeed connection settings and token |
data/avatars.json | Registered platform accounts and session data |
data/blacklist.json | Local content filtering rules |
logs/ | Daily-rotated audit logs (history_YYYY-MM-DD.json, max 1000 entries per file) |
Tip: Back up the
data/directory regularly, especiallyavatars.jsonwhich contains your session data.
Updating the Agent#
To update to the latest version:
docker compose pull
docker compose up -d
The agent will restart with the new image. Your data in ./data and ./logs is preserved across updates.
Troubleshooting#
Agent not connecting to HubFeed#
- Verify your API token is correct in the Setup tab
- Check network connectivity to
https://hubfeed.io - Review agent logs:
docker compose logs -for checklogs/history_*.json
Telegram authentication fails#
- Ensure phone number is in international format (
+1234567890) - Check your Telegram app for the verification code
- If using QR code, ensure your phone has internet access
- Verify 2FA password if enabled
Jobs not executing#
- Confirm the polling loop is started (green status in the Status tab)
- Check that avatars have active sessions
- Verify sources are configured for each avatar
- Review the History tab for error details
Avatar shows as disconnected#
- Platform sessions can expire; re-authenticate the avatar
- Check if the account was logged out from another device
Need more help?#
Contact our support team at support@hubfeed.io.
Next Steps#
- BYOD Agents — Learn about the agent security model
- Configuration Blocks — Connect avatars to your workflows